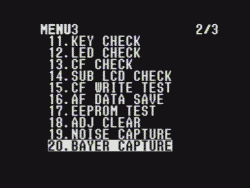
20.BAYER CAPTURE (12.BAYER CAPTURE for the QV-2000UX) and press the shutter to start it. You will be in REC mode.
On this page you'll find:
Casio had hidden the option to create raw 1 format files for their cameras, considering it to be a test option rather than a photographic tool. The efforts to decode the format have been shared among many - in particular the format for the QV-5700 proved very tricky.
The QV-3000EX (and by default the QV-3500EX), QV-4000 and QV-2000UX formats were analysed using Irfanview's raw viewing option and converted them using a command line program called Dave Coffin's dcraw. This program proved very helpful in analysing the QV-5700 and Exilim P600 format too.
dcrawDave Coffin included the Casio formats from version 4.7 onwards, so I no longer distribute the source. As he suggests on his page "If you're familiar with the DOS command line but don't know C, you can install this free C compiler for Windows and compile dcraw.c quite easily".
I downloaded the compiler DJGPP and compiled the program dcraw.exe on a Windows 2000 SP4 PC.
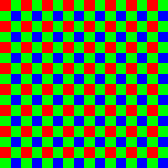
The Casio raw formats are "pure" dumps of the RGB Bayer-filtered CCD data with no attempt at compressing or encoding formats. For an explanation of Bayer patterns try How Stuff Work's "Capturing Color: Bayer Filter" page or the Color Filter Array page on DP Review.
| Model | Filename & place | File size (bytes) | Pixels (w x h) | BPP | CCD |
|---|---|---|---|---|---|
| QV-2000UX | NOCOMP.BAY | 1,976,352 | 1632 x 1211 | 8 | 2.11M total pixels |
| QV-3000EX | NOCOMP.BAY saved in dir with JPG, unless first photo, then saved in root dir. Overwrites any previously saved NOCOMP.BAY in the same dir Must be deleted from PC (see warning below) | 3,217,760 | 2080 x 1547 | 8 | Sony ICX412AQ 1/1.8", 3.34M total pixels 2088x1550 |
| QV-3500EX | NOCOMP.BAY - same notes as above | 3,217,760 | 2080 x 1547 | 8 | Same as above? |
| QV-4000 | KXnnnnnn.RAW | 7,684,000 | 2260 x 1700 | 16 | Sony ICX406 1/1.8", 3.98M total pixels 2312x1720 |
| QV-5700 | ddhhmmnn.BAY saved in root dir | 6,218,368 | 3232 bytes x 1924 rows 2576 x 1924 pixels + 12 trailer bytes per row | 10 | Panasonic MN39593PT 1/1.8", 5.36M total pixels 2620x1984 |
| Exilim P600 | CIMGnnnn.RAW saved in photo dir | 9,313,536 | 4288 bytes x 2172 rows 2858 x 2172 pixels + 1 byte per row | 12 | 1/1.8", 6.37M total pixels 2858x2172 |
| Exilim P700 | nnnnCIMG.RAW saved in photo dir | 10,979,200 | 4672 bytes x 2350 rows 3114 x 2172 pixels + 1 byte per row | 12 | 1/1.8", 7.41M total pixels 3114 x 2350 |
| Exilim EX-Z55 | nnnnCIMG.RAW saved in photo dir | 7,753,344 | 3904 bytes x 1986 rows 2602 x 1986 pixels + 1 byte per row. | 12 | 1/2.5", 5.25M total pixels |
Please contact me if you know any more details for other Casio cameras, like the QV-2900UX and similar "swivelling lens" model Casios.
On this thread technicsplayer tested the QV3500-EX for Noise & Bayer Capture. He points out that trying to delete the folder containing the NOCOMP.BAY file will corrupt your memory card, requiring a re-format and loss of all the images on the card!
Beware trying to delete the folder with the BAY file on the camera, it does not like it. Delete the folder on the PC. If you try and delete on the camera it corrupts the card and the camera tells you to format the card.
So, QV-3000EX and QV-3500EX owners, make sure you backup your images and/or delete the NOCOMP.BAY file via USB connection from your PC.
The procedure below is for the QV-3000EX unless otherwise stated. It is similar for the other cameras listed above, I'm told. Thomas Thissen has a page detailing how to do it for the QV-4000EX.
20.BAYER CAPTURE (12.BAYER CAPTURE for the QV-2000UX) and press the shutter to start it. You will be in REC mode.
IMAGE FLAG option - arrow down and choose thatNotes:
CIMG0075.JPG --> 0075CIMG.RAW. IMAGE FLAG - arrow down and choose thatNotes:
CIMG0075.JPG --> 0075CIMG.RAW. On this thread at DPReview, Z750 owners say that following the process below brings up a menu missing option 6 for the Bayer mode/raw. No raw for Z750?.
So far there's two conversion methods for each of the QV2000UX, QV3000EX, QV3500EX and QV4000. As far as I know the QV-5700's raw format can only be converted with dcraw:
dcrawThis has options that suit the 16-bit QV-4000 raw images better than Photoshop, and can also be used for the QV-2000UX/3000EX/3500EX (8 bit). It also converts the QV-5700 raw format.
dcraw (see link above). Type dcraw on the command line to get help.
NOCOMP.BAY (it can be called anything) at the command prompt type
dcraw -f NOCOMP.BAYThe "-f" option ("interpolate RGBG as four colors" according to the help) is used to eliminate the "screen door" artifact. David Coffin says that this "results from even-row and odd-row green pixels responding differently to ultraviolet light. '-f' interpolates the greens as separate colors, then mixes them for the final product".
Loading Casio QV-3*00EX image from NOCOMP.BAY...
Scaling raw data (black=0)...
VNG interpolation...
Converting to RGB colorspace...
Writing data to NOCOMP.ppm...
The file
NOCOMP.ppm is in Portable Pixel Map format, a 24-bit RGB format, and can be opened with Irfanview.kx8210000.raw (it can be called anything) at the command prompt type
dcraw -3 kx821000.rawThe '-3' invokes 48-bit output
Loading Casio QV-4000 image from kx821000.raw...
Scaling raw data (black=0)...
VNG interpolation...
Converting to RGB colorspace...
Writing data to kx821000.psd...
which looks quite dark at first in Photoshop, then hit Autolevels - WOW! Dave Coffin gives the reasons for this on his site:
Why is 48-bit output dark (or unreadable)?
Because I don't attempt to adjust the brightness. If you have a 48-bit image viewer (like PhotoShop 6.0 or Film Gimp), correcting the brightness is easy. If you have a 24-bit image viewer (XV, GIMP, and most others), you must choose 24-bit output!
02150707.BAY (it can be called anything) at the command prompt type
dcraw 02150707.BAY
Loading Casio QV-5700 image from 02150707.BAY...
Scaling raw data (black=0)...
VNG interpolation...
Converting to RGB colorspace...
Writing data to 02150707.ppm...
The file
02150707.ppm is in Portable Pixel Map format, a 24-bit RGB format, and can be opened with Irfanview.CIMG0075.RAW (it can be called anything) at the command prompt type
dcraw CIMG0075.RAW
1 - "Raw format" means the raw binary data from the cameras' CCD, unprocessed by the camera. It is not capitalised in normal usage - unlike the JPEG or TIFF formats, it is not an acronym but a normal English word with a normal meaning - "unprocessed".